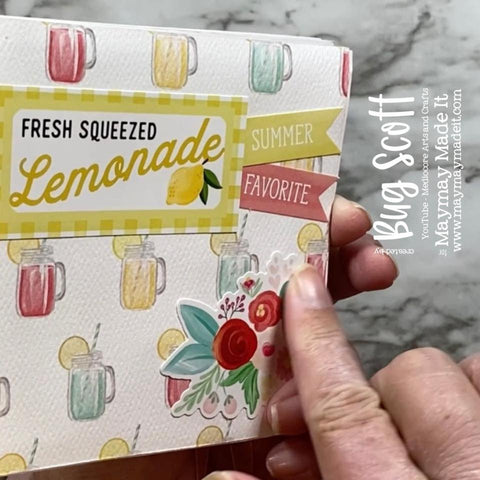
Hi! Bug here from @mediocreartsandcrafts. This mini album design came to me when I was scoring card bases. It uses the book binding design, but is modified to create space between the pages – this creates a larger area between pages so you can add some bulky embellishments, without giving it that wonky, overstuffed look.
Supplies:
Carta Bella Summer Market Collection https://bit.ly/3h9T6FQ
White Cardstock https://bit.ly/2Sj0cQh
Fancy Ribbon https://bit.ly/3jii3Si
Art Glitter Glue https://bit.ly/2TpxE7M
Paper Trimmer https://bit.ly/3h5WUIx
Scoreboard https://bit.ly/3xKsrX6
Teflon Bone Folder https://bit.ly/3vroXsa
Directions:
1. Cut six pieces of cardstock to 4 ½” x 11”
2. With the paper in your scoreboard at 11” West to East, score each sheet at:
a. 4 ¼”, 5”, 5 ½”, 6” & 6 ¾”

3. Fold as shown in picture – Fold in half at the 5 ½” score.
a. Keeping the paper folded in half, fold again at the scores that are both ½” away. (These were the two scores at 5” and 6” when the sheet was unfolded)
b. Fold again at the next set of scores (these are the two scores at 4 ¼” and 6 ¾” when the sheet was unfolded)

4. Glue the smallest folded section down. Glue the next folded section together (on the ‘inside’) as shown, to form a ‘book binding’


5. Stack your six pieces of folded up glued cardstock on top of each other. I only put glue on the small ½” section of cardstock. Use your work surface to make sure they stack up nicely and are aligned on all four sides.

6. Cut a sheet of white cardstock to 4 ¼” x 10 ½” and glue around your book to make a plain white cover – You can score before gluing down – at 4 ¼”, 5”, 5 ½” & 6 ¼”.

7. Cut 26 4”x4”squares of designer cardstock and glue onto your pages. You will have about 1/8” boarder of the white cardstock showing on all sides.

8. Grab some of your favorite ribbon and glue a couple 16”-18” strands on to your plain cardstock cover.

9. Cover with a piece of the designer cardstock and decorate with stickers from the sticker sheet.