Hi! Bug here from @mediocreartsandcrafts. I was so excited to use the Carta Bella Family Night collection for this super easy mini album. The directions below might look long but basically I just took some chipboard pages and cardstock hinges and ta-da a super sturdy chunky mini album. You can find a full tutorial on my YouTube channel Mediocre Arts and Crafts here:
Supplies:Carta Bella Family Night collection https://bit.ly/33OJN82
Chipboard- medium weight https://bit.ly/3tYNnah
Black cardstock https://bit.ly/33QGzBi
Cutter Bee Scissors https://bit.ly/2SWI3HT
Art Glitter Glue https://bit.ly/2SYgs9e
Paper Trimmer https://bit.ly/3eRIlrW
Scoreboard https://bit.ly/3bv8sDaT
eflon Bone Folder https://bit.ly/3tXjXJI
Elizabeth Craft ¼” double sided adhesive https://bit.ly/3w7ij9O
Cutting guide:
From the Carta Bella Family Night collection cut:
-20 pieces of 6” x 6” for your pages
-2 pieces of 5 7/8” x 5 7/8” for your front and back covers
-1 piece of 2 ¼” x 5 7/8” for the spine cover
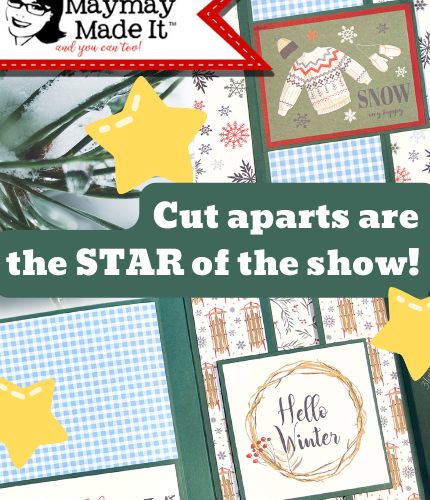
-Deconstruct cut-apart sheets
-11 pieces 6” x 6” black medium weight chipboard
-1 piece 2 ½” x 6” black medium weight chipboard
-11 pieces of 6” x 1” black cardstock strips (I used 65 lb cardstock)
Directions:
1. From the 6” x 6” cardstock pages, choose which you want for your front and back covers. Stack the rest in the order you want them to appear in your book. When using double sided paper, I put a sticky note on the side I want facing outward (the side I’m not going to put glue on) to help keep them in order. Here I also put the the words ‘front’ and ‘back’ on the notes as a reminder.

2. Score and fold the 1”x6” (1” east to west/6” north to south) cardstock strips at ¾”. These are your book hinges so to allow for easy movement, be sure they have a crisp burnished fold.

3. Take a cardstock strip and adhere the ¾” section to a 6” x 6” piece of chipboard, as pictured. The ¼” section of your cardstock strip will hang over – this is the hinge that will be attached to the spine. Burnish well. Do this ten more times, creating eleven hinged pages (one front cover, one back cover and nine inside pages).

4. Laying the 2 ½” x 6” piece of chipboard on your work surface, lay a 6” x 6” piece of hinged chipboard flat next to it. Remove the adhesive backing and adhere to the spine. This Is the book cover, and the cardstock hinge should be hidden from the front.

5. For the remaining pages and back cover, the hinges will go in the opposite direction, as shown. From the bottom of the book it looks like this LJJJJJJJJJJ. Adhering the cardstock hinges snug against the previous page, you should have just enough room for all the pages. For the last page (the back cover) revisit step 3.

6. Glue your cardstock pages into your book. The cardstock and chipboard pages are the same size, so the fit is snug.

7. For the 6 ½”x3” pieces of cardstock, lay them in your scoreboard with the 6 ½” side north to south. At ¼” and 6 ¼” then rotate clockwise and score at ¼” Fold at the scores and burnish to create your pocket. Optionally you can cut away the two tiny ¼” x ¼” squares of cardstock that the scores created, if Glue each pocket by the three tabs on the page of your choice.

8. Find your four favorite cut aparts and glue them into your book by putting a bead of glue across the bottom and one side. This creates a spot in your book that you can tuck photos or other ephemera behind.

9.Glue down your front and back covers, and your spine. Decorate the front cover using your favorite of the stickers and/or remaining cut aparts.