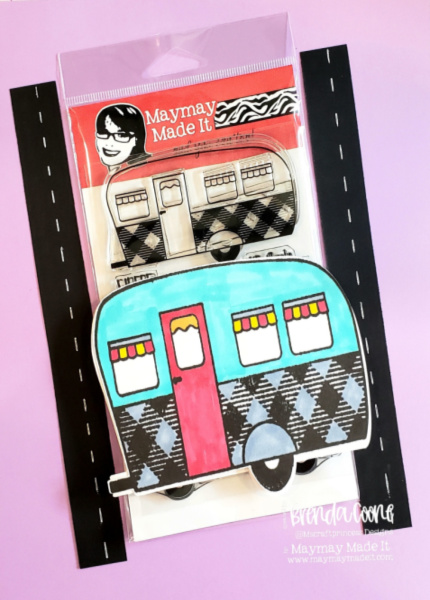
Assembly instructions:
1. Stamp the travel trailer image on a scrap piece of white cardstock using Memento Tuxedo Black Dye Ink.
2. Scan the image into your computer/laptop.
3. Visit SVG files for stamps – Maymay Made It and select the “His Pathway” SVG file. Save the file to your computer and upload it into Cricut Design Space.

4. Duplicate the SVG, flip it horizontally, align the tailgate, select the SVG Images and weld them together. This forms your card base which is the shape of the travel trailer.

5. Cut the card base on your Cricut machine. While I have a Maker, the Explore Air 2 works for the card also.
6. Fold and score the card base.


7. Cut the stamped image with your Cricut machine.

8. Color the image.


9. Adhere the colored image to the card base with Bearly Art Precision Craft Glue.

10. Add a sentiment when you’re ready, and send it off to put a smile on someone’s face.