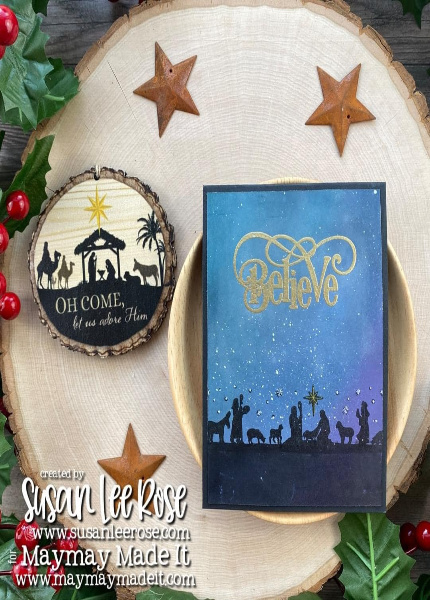
Hey, y’all! It’s Susan Lee from @susanleeroseblog. Today I am bringing you this beautiful ink blended silhouette card featuring the Just Believe Stamp Set. I LOVE making silhouette cards with ink blended skies. Sunsets, sunrises, and night skies are so beautiful, and I love to recreate them using Distress Oxide Inks. I really felt like the manger scene silhouette would be beautiful against a night sky and I am so happy it turned out prettier than I pictured it in my head!
Materials:
–Just Believe Stamp Set https://bit.ly/3BLIBlC
–BM Alabaster and Raven cardstock https://bit.ly/3pxcoZU
–Distress Oxides (Black Soot, Wilted Violet, Faded Jeans, Broken China, & Peacock Feathers) https://bit.ly/3dnMdzQ
–Onyx Black VersaFine Ink https://bit.ly/2OXKx6C
–White Gelly Roll Pen https://bit.ly/3kn1Ziy
–VersaMark Ink https://bit.ly/3i5m8IL
–Nuvo Gold Embossing Powder https://bit.ly/3i5mm2z
–Tonic Studios Paper Trimmer https://bit.ly/3rCc9hd
–Pink & Main Mini Ergo Blender Brush https://bit.ly/3iN75CB
–WRMK Scoring Board https://bit.ly/3xKsrX6.
–MISTI https://bit.ly/3y7oyM9
–EK Tools Powder Tool https://bit.ly/3iNA0Gt
–Marvy Heat Embossing Tool https://bit.ly/2TzEurG
–Bearly Art Glue https://bit.ly/2TpxE7M
–White Acrylic Paint
–Spray Bottle With Water
–Gold Pen
–Toothbrush
Instructions:
Cut & score papers to the following sizes:
–Alabaster Cardstock | 5-1/4” x 4”
–Raven Cardstock | 4-1/4” x 11”, score at 5-1/2” (Card Base)

1. On the Alabaster cardstock ink blend the night sky background using a blending brush and the Distress Oxide Inks.

2. Spray the background with water and blot up with paper towels.

3.Water down the white acrylic paint. Dip the toothbrush into the paint and drag you finger over the bristles to splatter the paint across the background to give the illusion of stars.

4. Using the Onyx Black VersaFine Ink stamp the manger silhouette image from the Just Believe Stamp set on the bottom of the night sky background. You will want to raise it up about an inch from the bottom of the background. You will then want to use blending brush to fill in the bottom of the background with the Onyx Black VersaFine ink.

5.Use the Gold pen to drain in the details on the Christmas Star on the Manger Silhouette. Use the White Gelly Roll pen to add highlights to the other stamped stars on the image.

6. Brush the powder tool over the area you will be embossing. Using the VersaMark Ink, stamp the Sentiment onto the night sky background at the top. Sprinkle the Gold Embossing Powder on top.
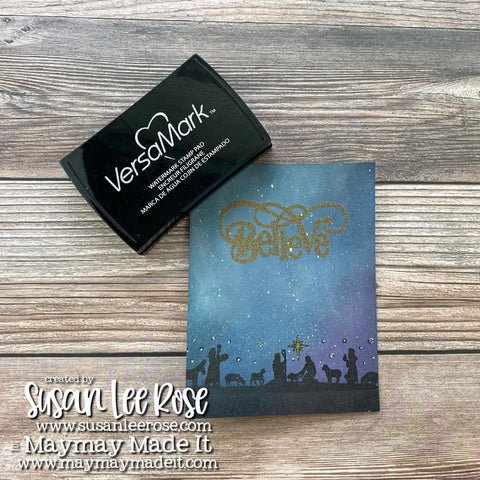
7. Using the heat embossing tool, emboss the sentiment on the background.

8. Attach the background to the front of the card base with the Art Glitter Glue.