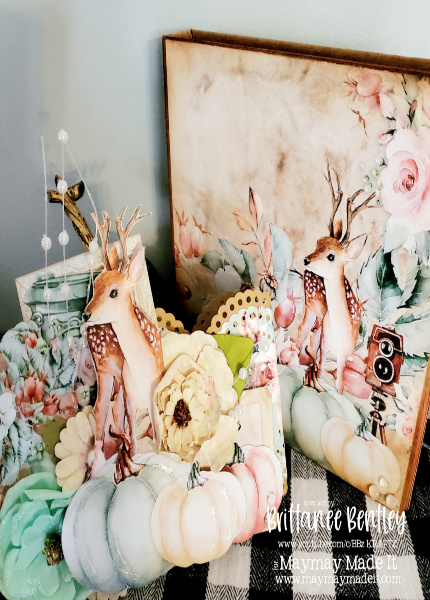
Brittanee here with @bbz_kraftz with a way of taking something that’s premade for you and completely making it your own. Using the Graphic 45 Waterfold Trifold Album and using the Cozy Evening Collection by Mintay, to create a warm feel to your upcoming Autumn photos.
Tools you’ll need:
Paper trimmer https://bit.ly/3h5WUIx
Detail cutting scissors https://bit.ly/3v0jgjB
Tonic Studios Teflon Bone folder https://bit.ly/3vroXsa
Bearly Arts Precision Craft Glue https://bit.ly/3rUZHs4
Cozy Evening Collection by Mintay
Graphic 45 Trifold Waterfall Folio Album https://bit.ly/3sU5SOw
Coordinating cardstock https://bit.ly/3pxcoZU
EK Tools Large Edge Punch https://bit.ly/3zjY6Qa
Dress My Craft Droplets https://bit.ly/3mvPWAC
Ruler https://bit.ly/3DkptMn
Pencil
Tim Holtz Distress Oxide (coordinating color) (optional) https://bit.ly/3dnMdzQ
Distress tool (optional) https://bit.ly/3qfjaDS
Corner rounder (optional) https://bit.ly/2TD2dY3
Glossy Accents (optional)
Cutting guide:
Waterfall Mats:
–(12 or more) 4 ¼ x 6 ¼
The waterfalls measure at about 4 ½ by 6 ½ . Please double check your measurements as they all may be different. I like to have a small border. You’re more than welcome to adjust to your liking.
–(2) 4 x 12 (plain cardstock)
–(2) 3 x 12 (pattern paper)

How to:
~Let’s first work on the waterfalls. There’s a total of 12 flips. I’m matting just the outside so that I can journal on the other side. For me, the pages measure to be about 4 ½ by 6 ½ and I still want there to be a border for my pattern cardstock showing if I place a 4 x 6 photo on there. So I cut my 12 mats at 4 ¼ x 6 ¼ . Optional: to match the looks of the kraft color and overall feel of the collection, I’m taking my distress oxide and distressing the album and my pattern papers.

~Next you’ll mat all of your waterfall pieces. There’s a bit of space at the end of the waterfalls. You can choose to mat that area as well, or leave it blank. I also decided to not worry about covering the closure pieces that hold together the waterfalls.

~There’s a flip pocket in the middle of the album. To cover the outside, I first measured the pocket. Then I flipped my pattern paper over to its backside on the other side of the pocket flip and traced the thumb notch opening. If you have a circle punch that measures out to be the same as the space, you can use that instead. Because I’m matting both sides, I traced another piece of pattern paper and I used my scissors to cut out the traced area.

~This will take some trial and error, but adding an insert inside the pocket; you might have to go back and forth with measuring the space. Cutting and trying, cutting and trying, until you get a piece that can easily slip in and out. With the side pocket on the left part of the album, I measured accordingly to find the perfect fit of my pattern paper to slide inside of the pocket (with the side up that I’m wanting to mat on top) and I traced the outline of the pocket.

~To truly make the album your own, we’re going to take our 12 in pieces of cardstock and pattern papers and use the border punch. Make sure you line it up properly and all the way towards the back. Push down on the punch and slide your cardstock over so that the punched area matches with the guide on the punch. Continue this to the end, flip your paper over and repeat on all papers.

~Now you’ll take your solid cardstock and wrap it around the album. One piece won’t wrap completely, so that’s why you cut out two. Try your best to line the second piece on top of the current one. Adhere it down and continue to wrap your album. You won’t need all of the second cardstock, so you’ll cut it to where you can snuggly have it covered and on top of the previous piece. You don’t want the belly band to be too tight where you can’t remove it, but you don’t want it to fall off either. Take your pattern band strips and apply it on top of your solid cardstock band. Again, wrapping it around and adhering it appropriately.

~And on to my favorite part, decorating! Using the elements of the cut aparts in the collection, fussy cut (or use your cutting machine if you have one that can cut them out for you) and cut out the ephemera pieces you’re wanting to use. I myself also used the cut aparts from the collection (the frames) to create a base to make it easier for me to do some layering.

~Once layered and decorated to your liking, take your water droplets from Dress My Craft and apply them to your belly band and/or album. Use Glossy Accents to help enhance some decorative features on your album.

I hope you’ve felt cozy enough to take part in creating a warm feeling in this mini album. Even if you didn’t make it from scratch!
